Showing posts with label natural dyeing. Show all posts

Tuesday, October 15, 2013

Wall clock and Passport case-DIY

Process of Natural dyeing and Patchwork - Wall clock and Passport case
Material : 100% silk (Dupioni Organza)
                gardenia seeds, indigo leaf, dried indigo leaf powder

The Silk Dupioni Organza that I use is very good to do natural dyeing. It is woven by cocoons 100% so the result of  dyeing with most of vegetables is pretty nicer than cotton or wool. When I was doing work, my friend gave me Indigo Leaf so I decided to do natural dyeing with that pushing the work I was doing back. Then the color came out satisfactorily so I started making a passport case and a clock.The passport case is made by Silk used Indigo Leaf and Dried Indigo Lear Powder, and Gardenia seed silk was added for the clock. Silk Dupioni Organza have different feel with existing fabric in comparison bacause it has feeling like paper.


Process of Indigo Leaf Dyeing
The process of dyeing wasn't taken photo, so here I descript cover for it.      
1. Wash the Indigo Leaf for removing soil.
2. Grind it.
3. Prepare three vats of cold water. Would be better colder
    and colder.
4. Put step2 to a net and soak it to one of vats. Knead the
    net while  it's in the water to extract dyeing solution.
5. Put the squeezed net into the second vat of cold water
    and squeeze the net again.
6. Do the same work in the third water once again.
7. Mix the water(dyeing solution) of three vats.
8. Spread a fabric well, put it into water by step7
    and knead the fabric for 25 mins.
9. Prepare ice water for putting the dyed fabric into there.
    The fabric should be rinsed.
10. Squize the fabric softly and dry it in a cool place.

Process of Indigo leaf powder Dyeing

I have dyed using of Indian Indigo Leaf Powder
1. A few days ago of dyeing, powder should be dissolved in water(ph11).
    I used Natural Lime Powder instead Casutic Soda.
2. Skim off foam if the water of step1 have it and warm the water temperature up to 40 degrees.
3. Put Hydrosulphide into a little water and dissolve it.
4. Put the water of step3 into step2's water and leave it (do not stir) for an hour.
    Then it comes out like light green color.
5. Soak a fabric in water step4 and knead it for 10 minutes in water.
    The fabric must be soaked deeply to prevent stain as the fabric meet air.
6. Squeeze the fabric gently and spread it out in shade.
7. When it is dried, put the dyed fabric in water for 1~2days to remove alkali completely.


Process of Gardenia Dyeing
Check a linked page about Gardenia Dyeing Process. go to the page about Gardenia Dyeing 

The Indigo leaf dyeing was more interesting for me than Indigo powder dyeing because I usually don't like using chemical fixative for natural dye. For dyeing with Indigo leaf, don't need to use chemical fixative. If you want to dye with Indigo powder using natural dyestuff perfectly, the process will be much more complicated.


Finally Making is started!
I started making clock with Silk Dupioni Organza which was given from the process of dyeing above. Actually the clock was designed for hand dyeing(chemical) but I was curious that how comes it out with Silk Dupioni Organza by natural dyeing. So I chose three materials as close with chemical dyeing as possible but the dyeing work was much harder and longer than what I expected.
I used a clock case and hands of a clock which are good at patchwork fabric,
and fixed clock movement. I did hand sewing like a photo below to make it exquisitely.
The nails were used for the dial of a clock. As I already mentioned, Silk Dupioni Organza which is stiff and crisp looks simple and modern but it is quite harder than cotton to sew by hand or machine.
Last step was covering the clock with a glass case.
The other one was making a passport case. When I was thinking about what I can do with remaining fabrics from the clock making, my passport jumped to my eyes. Silk Dupioni Organza is a see-through fabric so the passport can be seen. It doesn't need to be covered off at an immigration checkpoint.
I did work with dyed silk, blue color(Indigo Leaf) and deep blue color(Indigo Powder).

It was also made by hand sewing, the fabrics were very thin and slippery so sewing was not easy. Even though the sewing is not good but the silk is well mended fabric. So when the work is done, you can see the cover is better than you thought before it was finished.
I, who likes travel, has two passports. :) The name of a country on front can be seen like below so it doesn't have problem with the cover when you pass the Immigration.
I mostly dye and draw on silk, (these days especially Dupioni Organza), but I make variety things by sewing to be refreshed from time to time. I could get totally different works from silk because it's stiff or paperlike feature compare with cotton patchwork like quilt.  

Wednesday, September 25, 2013

Make Lamp with branches - Collaboration

It is a lighting made by a sculptor, done patchwork used natural dyed Silk Dupioni Organza. The sculptor is interested in dead branches therefore this work was done using them. She, the sculptor, had seen my natural dyed silk by chance and then suggested me that made a work together. I gave him my patchwork which might harmonize with dead branches well so he made the lighting with wood. The Silk Dupioni Organza was very good to make the lightings because it is naturally irregular in texture so makes more gorgeous with light.


The sculptor tried to bring the dead branches to life covered natural silk on it. The colors from natural material matched well with the branches. The Silk Dupioni Organza what I used was also 100% natural silk. Thus, all of materials except a part of light were given from nature.


Patchwork pattern was expressed well reminding of another dead branches in order that the sculptor's intention .

The feature of the Silk Dupioni Organza
is showing variety of appearance
by the location and the intensity
of the light.
Of course, all kinds of see-through fabrics
have the same feature of it,
but the Silk Dupioni Organza can't be
compared with artificial silk organza.
Because it is silky naturally with glossy
effect. From it, the beautiful changing color
has created.
She insisted fabrics dyed 100% natural materials without chemical changes and that was an excellent choice to reborn the dead branches as the lighting.


I found out that how important is the finished product not only concerns for dyeing and pattern. Bringing to this work, I'm considering of collaborations with more craft artists, lighting & interior and curtain designers who have attention to my fabric.

Sunday, September 22, 2013

Patchwork with naturally dyed silk - Gardenia, Sappan wood

I was hooked on natural dyeing last year. I prefer real natural material dyeing rather than dyeing with powder. Silk is dyed well when vegetability materials are used. If you want to do successful dye with materials such as onion skin, mugwort then you should dye silk. Because treads from silk cocoons like vegetable. The picture below is the work used Silk Organza that were dyed with gardenia and sappan wood. Here is more information about this patchwork.

The processes of dyeing with gardenia and sappan wood are quite simple but they make so gorgeous color. If you can get gardenia and sappan wood then why don't you try to do dyeing silk through the way below?


Dyeing using Gardenia

1. Keep gardenia soaked in water for half the day and then boil it. Simmer it another 30 mins after it has  boiled.(Boiling term can be modulated by the dyeing materials' condition. It means that if the coloring looks enough then boil it for just 10 mins more).

2. Prepare Alum. I don't like using chemical fixative, so usually use a bit mild burnt alum which is sold at Oriental medical clinic.(They sell burnt alum which is edible.) Dissolve the burnt alum(5% of the fabric weight) completely in 50degrees water and put the silk in it. Keep the silk like that with kneading sometimes for 20 mins.(the liquid not thrown away after that)
3. Prepare dyeing solution. Shift well the boiled gardenia. The solution temperature needs to be 60 degrees.(That's suitable for silk) Put finished step 2's silk into the solution and dye it about 30 mins. If you knead the fabric well at this time the coloring would be better.
4. Put the dyed fabric into step 2(Alum water) for fixing color and knead it for 15 mins.

5. Rinse the silk with water and dry it in shade. The picture below is the result of dyeing Silk Dupioni Organza with gardenia.


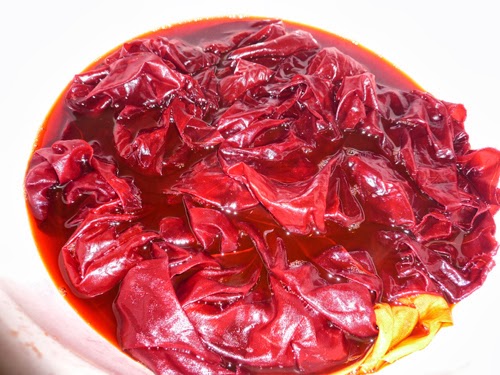
Dyeing using Sappan wood

Sappan wood is a plant growing in the tropical regions and the red-yellow wood part is used for reddish dyestuff. The terms of keeping steeped sappan wood in water depends on the state of the wood before dyeing. Generally soak it about 3~4 hours then extract dyeing solution but it should be in water the day before dyeing if the wood is in so dried state. Using the alkali water(ph8~9) for dyeing deep red color. I didn't use the alkali for changing the color, just used for extract deep red coloring.  The process of below is about intense red dyeing using sappan wood.
  
1. Soak the sappan wood in water for 3~4 hours before dyeing.

2. Prepare water which is alkali(ph8~9) and put the soaked sappan wood in water and boil it. 
I used 'Natural Lime Powder' instead 'Casutic Soda' for making alkali water. (At the moment in Korea, people are dyeing naturally as traditional ways with Natural Lime Powder and avoiding using chemical fixatives more and more..) The sappan wood is helpful to be extracted the solution when it's boiled in alkali water.
3. Shift well dyeing solution of  sappan wood and do the step 2 once again. That is, use the extracte sappan wood again and mix the solutions from fitst and second step. It will be dyeing solution.

4. Prepare water for color-fixing with alum. Dissolve alum(5% of the fabric weight)  completely in 50 degrees water and put the silk in it. Keep the silk like that with kneading  sometimes for 20 mins.
(keep the alum water for another step) This part makes the fabric coloring effectively. The sappan wood come out well for dyeing but the fastness of original color is not as good as gardenia so shouldn't skip this step.
5. Neutralize the prepared dyeing solution of step 3 using vinegar or citric acid.(ph7)  
I needed perfectly red color so I neutralized the alkali dyeing solution before dyeing.
For your information, if you dye with alkali state of water then you can get violet series but the fastness of color is worse than reddish color.
6. Put the fabric into the solution and dye it. 
The water was about 50 degrees and dyeing time took an hour. The high temperature needs short time to dye and the low one needs more. I did it with low temerature for reducing the risk from dyeing that silk might have. If the fabric has stains when you dye then the low temperature and long time can be one of the key.

7. The dyed fabric needs to be soaked in water(step.4) for color-fixing. About 15 mins with kneading needed.

8. Rinse and dry it in shade.

Tip!
For coloring an orange, do dye the fabric by gardenia first and then dye it by sappan wood again. In that case, that's okay with the gardenia dyeing through the way of above. But the sappan wood dyeing needs to be check the color during the dyeing and should be dyed 5 mins more after getting color you want, then the proper color comes out.


Thursday, September 12, 2013

How to dye with onion skins

The onion skin is a useful material which is got lots of coloring easily. People who know I do natural dyeing around me give the materials from time to time. The onion is easy for getting color but only skin is used for dyeing so collecting of large amount of skin is quite uneasy. If you are interested in natural dyeing, spread about your interest to others. You may get much onion skin like me.

Let's start looking the onion skin dyeing. This is the basic way of natural dyeing using vegetable. I've used the Silk Dupioni Organza but the usual silk also can get the similar color, too. Though the cotton's color is lighter than silk's as I always say that the silk likes vegetables.

1. Boil water with dried onion skin. Keep boiling it for 20 mins more after it comes to a boil.  
I used 2L of water and 50g of onion skin.


2. Prepare the dyeing solution sift the filter net out.

3. Do the second decoction through step1 and 2 once again. It means that pour water to the onion skin what was extracted once and boil it for second decoction. This time the water needs the half amount of the beginning(1L). The onion skin can be third decoction caused by a plentiful color.

4. Combine the first, second and third dyeing solution together. Cool the added solution approximately down as 60 degrees and dye the fabric for 30 mins. 


5. Use Alum as a fixative. 
Soak the fabric in 60 degrees' water contained alum (5% of the fabric weight) for 30 mins. 
This step is for mordant dye.  

6. Rinse in water and dry it in shade.


The result of dyeing is satisfied though the onion skin was small quantity. The gardenia dyeing makes yellow color and the onion skin makes orange color like nearly gold.


I have tried shibori(a pole-wrapping technique)  pattern dye.